Posts

Wedding Decorations: Decorative Letters DIY

Image
 It's June! This means the wedding is almost here and I have completed most of what I need for decorations. Something I really enjoyed decorating/DIYing was the decorative letters for the welcome table. The base letters were made out of all the extra cardboard we had when we bought new furniture. After cutting out all the letters I needed, I used a glue gun to create "sides" to the letters.  I felt it look unfinished in just cardboard. So for some reason I thought paper mache-ing would help. I used 1 part flour to 1 part water to create the glue and for the paper I used old newspapers. Then after I finished the paper  mache-ing and letting it dry, I spray painted it rose gold. To be honest, I didn't like how it looked... it still had this bumpy texture and I felt it would make the wedding look cheap. I thought I would end up having to buy the letters instead...but a month later I was inspired by something I saw online. I decided to ...

Refurbished Chair Using Chalk Paint

Image
This first time I heard about chalk paint is when I was taking a walking break to the liquor store near work. I stopped by this cute looking shop and asked them what they sold here; we only sell Annie Sloan's chalk paint. I was so intrigued... how could you survive on just selling chalk paint? It must be SO GOOD. I thought chalk paint was the same as chalkboard paint, which I was informed was incorrect. Apparently chalk paint is popular because there is no need for sanding or priming a material before painting- usually those steps are required for paint to stick. After leaving the store, I was very intrigued by the idea of using chalk paint for these wooden chairs I have at home. My first idea was to use chalk paint for the white parts and then sand the wood colored area to restain it. Welp after much wasted time... I realized 1. Sanding isn't fun 2. I'm not good at staining (took me 2 tries to learn that). Below is a picture of the chalk paint for the white part of ...

Tips for De-labeling Glass Bottles

Image
My cousin asked me decorate his wedding on a budget of $500. At the time I thought it was a lot of money, but after researching ideas and pricing I quickly realized how little $500 gets you for a wedding. One of my ideas was to use recylcled beer and wine bottles- the reasoning being that they have small openings and would require very little flowers for each bottle and because I could recycle some of the ones I already have. So I started to get to work and I soon discovered how labor intensive this actual is.  Here are the lessons I learned from delabeling bottles: 1. SOAK SOAK SOAK! And not just for 30 minutes... at least a day or more. You can add soap to your water or whatever trick you have up your sleeve, but just make sure it sits in water for a while. 2. Some bottles will be easy to delabel than others. The easiest bottle for me to delabel is Stella Artois followed by New Belgium. My boyfriend said Guinness is actually very easy as well but we don't really drin...

New Painting

Image
I've been creating a lot since I've moved into my new place. So many empty walls and spaces makes me want to fill them. I created this painting on a canvas and using a mix of acrylic and spray paint. The base is grey and gold acrylic paint and it was spray painted over with rose gold spray paint; it felt like it was missing something.. and I got very frustrated. I didn't know what to do.. so I grabbed a bottle of black paint and squeezed it out in no systemic way whatsoever.  I wonder if abstract/modern artists, like Pollock, felt the way I felt when painting this- was he frustrated during most of his paintings? or was his paintings systematic? Anyways, every time I look at this painting it makes me laugh because I just replay how I felt at the moment of creating it... and it was not systematic in any way shape or form- but somehow, it didn't turn out too bad.

DIY Kinda Fail - Do Your Research

Image
If you have been following my blog, you are use to seeing my DIY posts..but this is a different type of DIY post because this is a DIY fail post. Let's start from the very beginning. I wanted to paint over this pot my parents gave me. The first word that comes to mind when I see this pot is... Easter and there is nothing wrong with Easter, but I wanted a pot that didn't seem so seasonal. I was at Michael's debating for maybe an hour on what type of paint to get... mainly between some chalk paint and these Art Minds outdoor paints that I got in the end. I think what deterred me from getting the chalk paint was that it said for indoor use only. Then I was thinking that I definitely need this outdoor one! Welp, I made a wrong choice. Chalk paint doesn't need the surfaces to be sanded or primed... and for some reason I thought it would work exactly like chalk paint except it was also suitable for the outdoors. I came to this conclusion because they were right next to ...

New Beginnings

Image
                                                                                                                                     

DIY: Create your own design on Terra Cotta Pots

Image
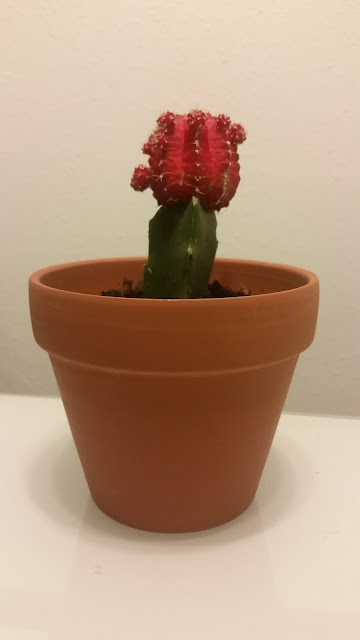
I picked up a new terra cotta pot from Daiso to put my cactus in. But it looked a little boring to me so I decided to paint the terra cotta pot with some acrylic paint. I used some tape with cat images on it that I picked up at an airport in Taipei in order to keep the design clean. Then I just painted away!! And here is the finished result sitting on my porch. It looks quite lovely and it was such a simple project to do.