Posts

Garden Updates

Image
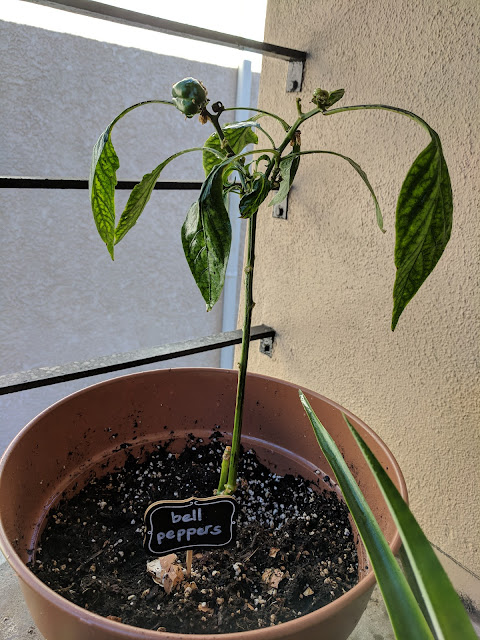
After coming back from a trip to NYC, I was greeting by a bell pepper growing on my front porch! Even though it was very exciting to come home to a bell pepper growing after a successful self pollination.... it has been a couple weeks and it hasn't grown any bigger.  My daikon radish has been growing pretty successfully for a while. I decided to pull them out this past weekend to pickle them. I felt pretty proud of myself for growing this one. All of these plants I have been planting from seed and so it is pretty satisfying seeing them grow.   Look at my beautiful babies!! My boyfriend and I decided to pickle a combo of carrots, daikon and jalapenos in a mix of rice vinegar, sugar, and water. We decided to taste the daikon before we pickle it... and to my disappointment they very bitter. There is a trick to removing the bitterness from a daikon that I just learned about; it involves washing the daikon in salt water 2-3 times and then washing it o

Bell Pepper Plant

Image
I planted a bell pepper plant over 3 years ago and I was able to get it to grow some leaves but nothing beyond that... that is, until this year! This year, I noticed it grew some flowers and like the idiot I am... I pinched them off right away (I read somewhere at some point when a plant is growing flowers you should pinch them off so the plant won't taste bitter. I didn't realize til later.. that you need the flowers so that your plant can pollinate and produce fruits... and whatever I read was for herbs). After a few months, I gave up hope that flowers would come back for my plant, but sure enough they did! I used a self pollination technique that I read about online. Here is a video of me trying to self pollinate for the first time. I was definitely nerding out! I'll need to update you if all of this actually works and I get some bell peppers! (I know it's not in season technically... but we live in Southern California.. so anything goes!)

How to Upgrade your Space for Under $75

Image
I've moved into my new place for over 5 months and our place just looks like I just moved in. When my boyfriend went away on a work trip, I decided I needed to update the space. I am cheap and so I didn't want to spend a lot of money. I chose our bedroom to update - I chose a space that we spend a lot of time in and felt I could do a couple changes for cheap. This is what the space looked like before in our bedroom (see below). My friend and my boyfriend use to live together.. and this use to be my friend's room... and I have no idea what he was thinking. First, the rod is TOO short for the window... and he was cheap and only bought one panel. Yeah, friend.. if you ever read my blog... I called you cheap! And so this window has been looking pretty sad for a while (and if you haven't looked yet, see below for evidence of its sadness).  The only changes I made to this space since I moved in was add those 3 little organizers to the right of the window and

Decorating a Wedding for $500

Image
Yup, $500 is the budget I had to work with. If you have the time and friends to help you... decorating on a budget is doable. Here is my breakdown for expenses: Welcome Poster and Chalkboard Markers 20 J&J sign 15 Wisteria garland from Amazon 50 Rope 3 Card Box 5 Table Number Tags 13 Wine bottles from Amazon (36, 3 boxes of 24)  66 Beer bottles from homebrew store (66 bottles, 3 boxes of 24) 45 Baby's breath from Costco 102 Mason Jars (14 jars, 2 packs) 16 18 Bouquets from Trader Joe's 120 SUM 455 Total plus tax 500.50 I found delabeling bottles to be time consuming and decided to buy the rest. I also realized during the wedding that I did not have enough mason's jars.. thank goodness the previous wedding party left theirs behind! For buying your own flowers, I advised buying them a couple days ahead of time and if you are doing flowers

Pictures from the Wedding

Image
Just wanted to share a couple pictures from the wedding! I wish I was able to take more pictures but there was a bit of an emergency and I didn't have as much time as I thought to decorate. Keeping in mind it was like 100 degrees F, I think we did a pretty good job decorating. Being a wedding decorator is a lot of work and it gave me deep appreciation for what they do.    

Wedding Decorations: Decorative Letters DIY

Image
 It's June! This means the wedding is almost here and I have completed most of what I need for decorations. Something I really enjoyed decorating/DIYing was the decorative letters for the welcome table. The base letters were made out of all the extra cardboard we had when we bought new furniture. After cutting out all the letters I needed, I used a glue gun to create "sides" to the letters.  I felt it look unfinished in just cardboard. So for some reason I thought paper mache-ing would help. I used 1 part flour to 1 part water to create the glue and for the paper I used old newspapers. Then after I finished the paper  mache-ing and letting it dry, I spray painted it rose gold. To be honest, I didn't like how it looked... it still had this bumpy texture and I felt it would make the wedding look cheap. I thought I would end up having to buy the letters instead...but a month later I was inspired by something I saw online. I decided to

Refurbished Chair Using Chalk Paint

Image
This first time I heard about chalk paint is when I was taking a walking break to the liquor store near work. I stopped by this cute looking shop and asked them what they sold here; we only sell Annie Sloan's chalk paint. I was so intrigued... how could you survive on just selling chalk paint? It must be SO GOOD. I thought chalk paint was the same as chalkboard paint, which I was informed was incorrect. Apparently chalk paint is popular because there is no need for sanding or priming a material before painting- usually those steps are required for paint to stick. After leaving the store, I was very intrigued by the idea of using chalk paint for these wooden chairs I have at home. My first idea was to use chalk paint for the white parts and then sand the wood colored area to restain it. Welp after much wasted time... I realized 1. Sanding isn't fun 2. I'm not good at staining (took me 2 tries to learn that). Below is a picture of the chalk paint for the white part of